

Difficulty - Medium
Time - Allow 60 minutes per side.
Tools required - A pair of 8mm bolts, screwdriver, spring release tool (can be manufactured), some coppergrease or HM grease and a selection of usual mechanics tools.
Introduction
Most 4.2 and 4.3 RAVs employ a rear disc brake and combine a drum parking brake into the design. The rear disc brake (foot brake) is a simple single piston design with a reacting bridge to the outer pad. In this design, when the inner pad touches the disc and cannot move any further, the outer pad is applied when the bridge is slid along guide pins with an equal and opposite force.
Changing the rear discs and changing the handbrake shoes goes hand in hand. Only when the shoes are in near perfect condition does it make sense not to change them. The handbrake is a "static brake", in other words it should only ever be operated when the vehicle is at a stand. For this reason, in theory it should never wear out. However, if new shoes are fitted with an old disc or vice versa, it follows that no "bedding" can take place and this is the reason that you should normally fit new with new. Having said that, there is a procedure for bedding a combination of old and new but this must be done with great care and is shown in a later pdf.
I won't pretend this is the easiest job in the world but in my opinion it is much easier than the 4.2.
If you are only changing the pads then you will be able to pick out the information that applies to you but you should not change the discs without changing the pads and the handbrake shoes unless they are virtually unworn. This tutorial is showing the right hand rear brake (drivers side UK, passenger side US)
CLICK THE IMAGES TO ENLARGE THEM!
I will start by showing you how I lifted and supported the car as this gets asked from time to time. I lift under the lower suspension arm;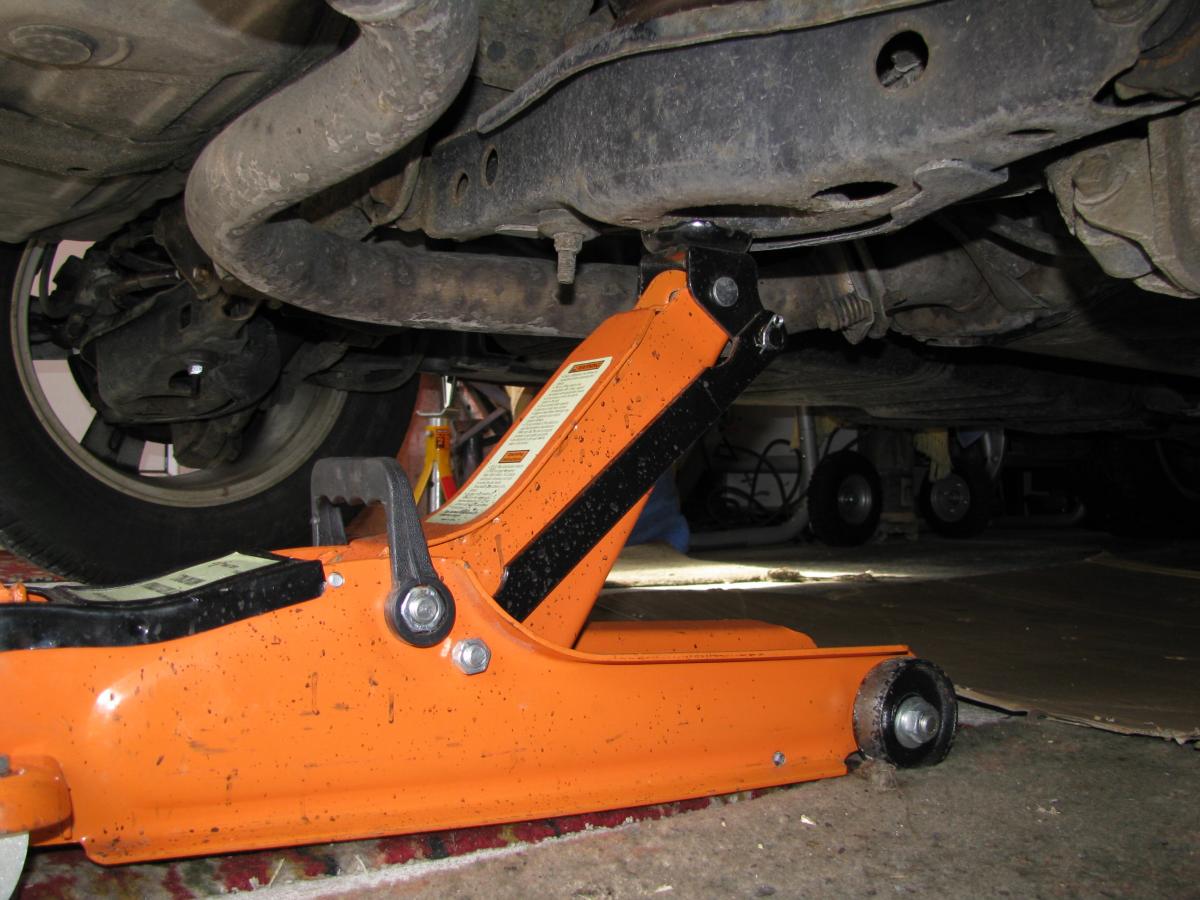
I support the vehicle under the front of the trailing arm (have you noticed the exhaust leak!);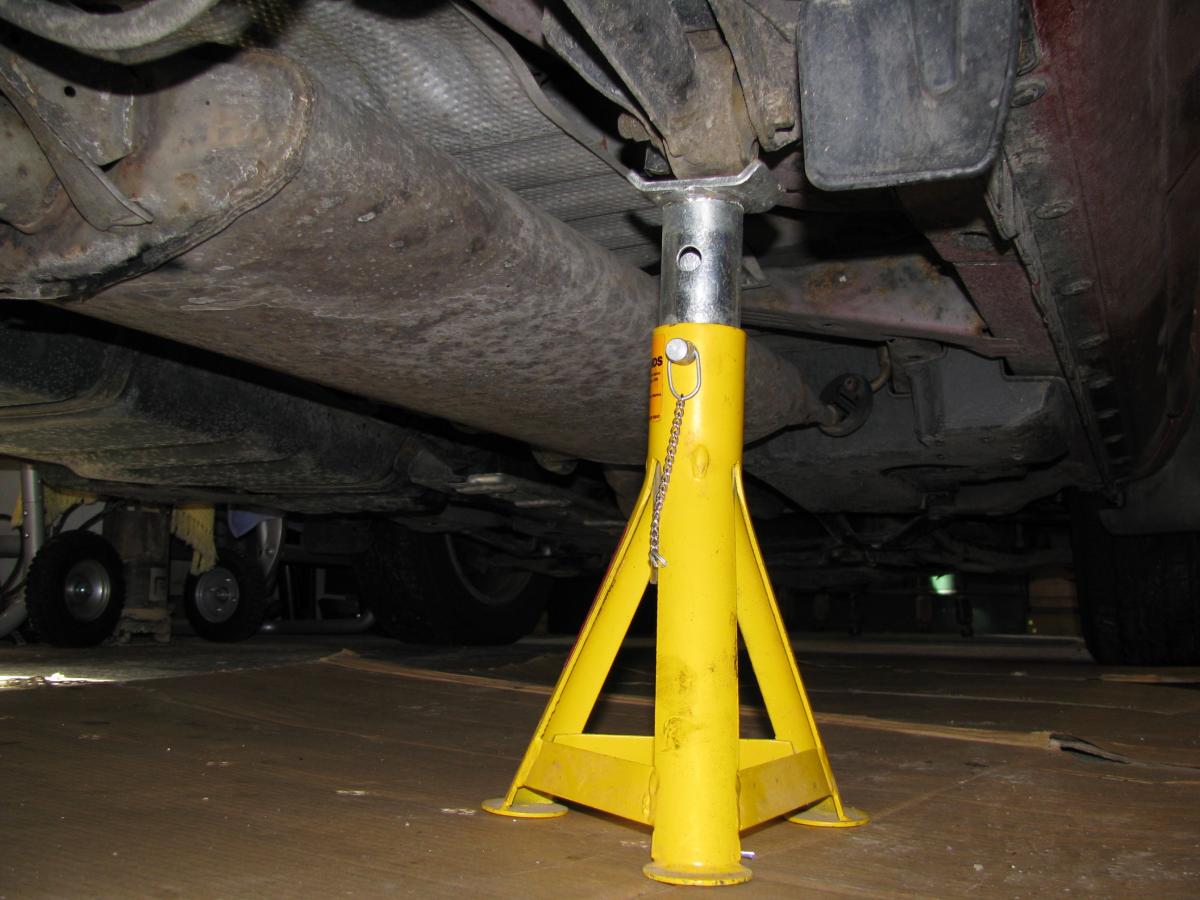
If you are only changing the pads, undo the lower 14mm headed bolt and swing the caliper up. As I was removing the disc I undid both and removed the caliper. It sits nicely on the suspension arm at the back.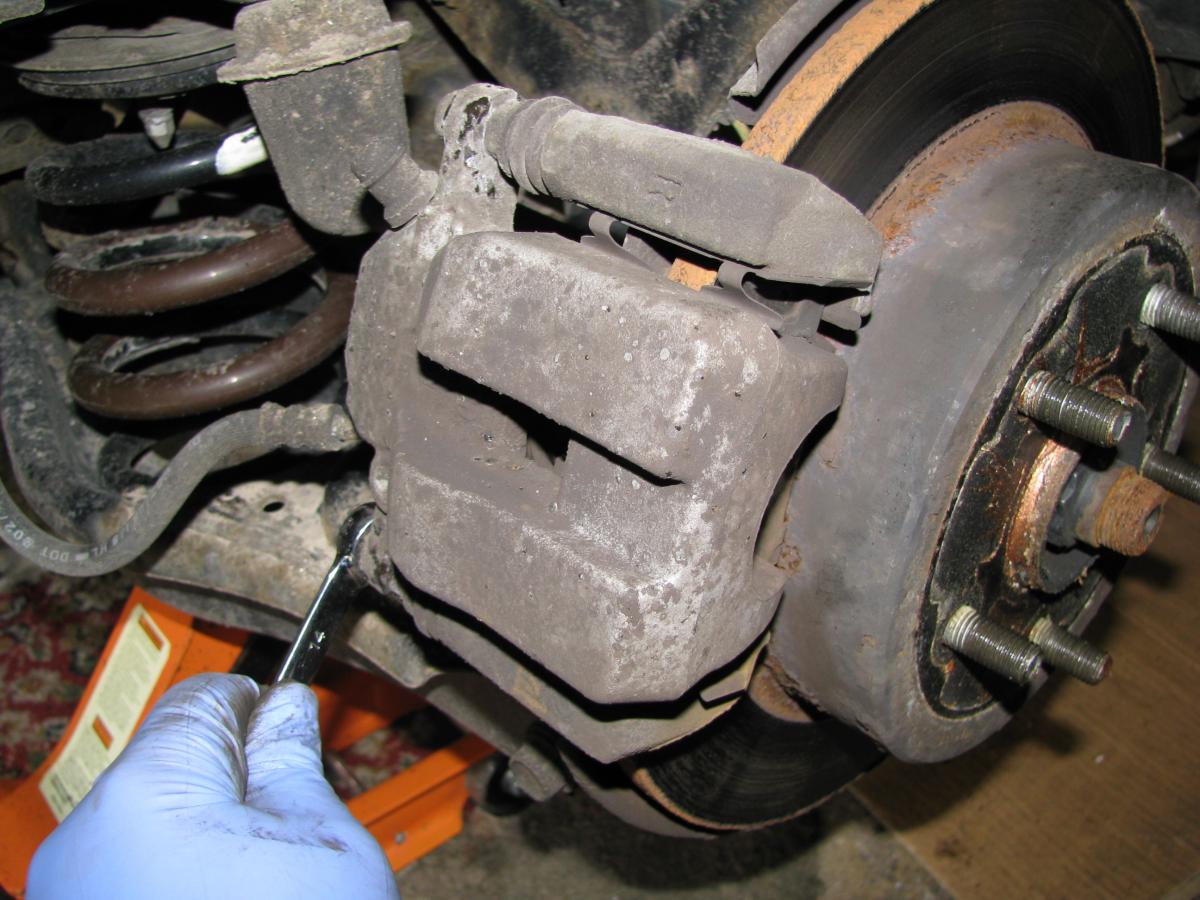
Now just prize out the pads with a screwdriver (for changing the pads only, jump forward to pushing the piston in);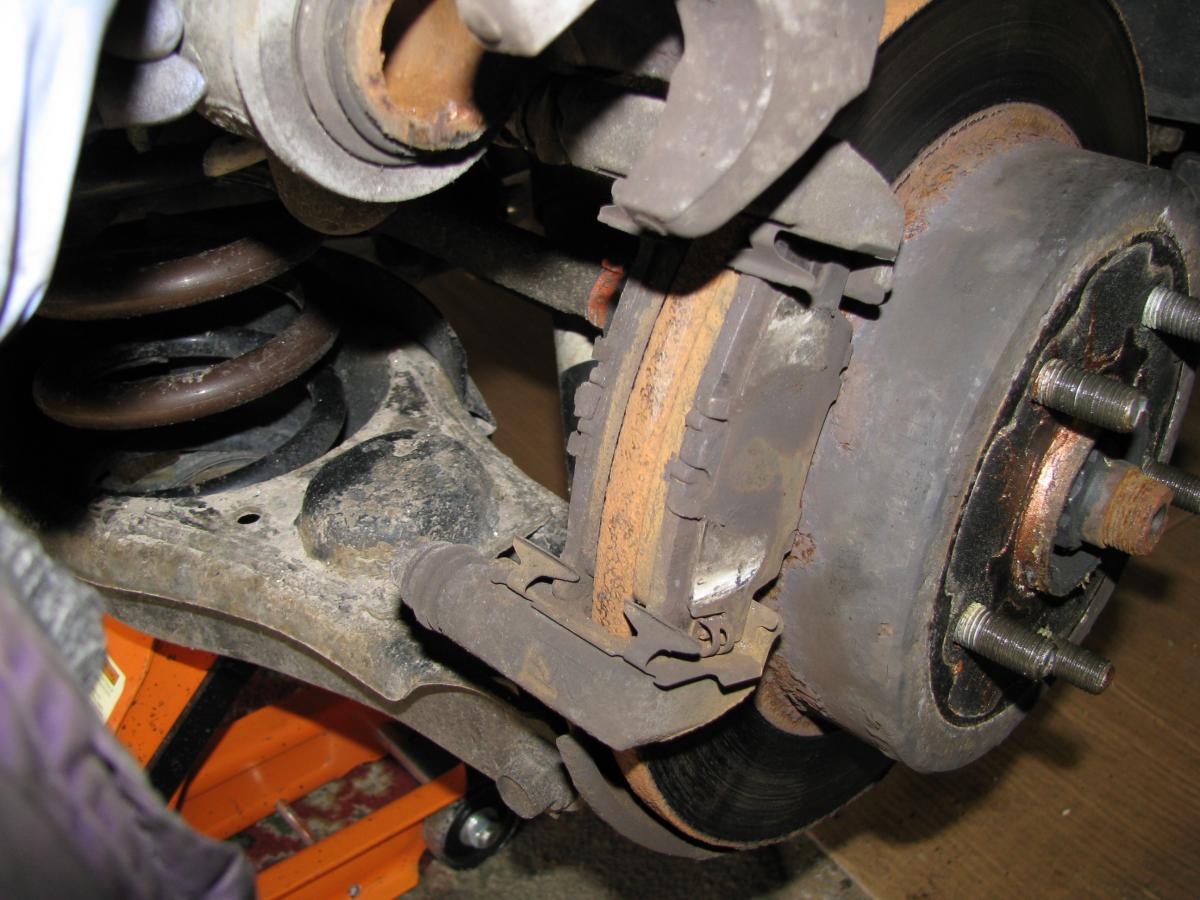
Now undo the two 17mm headed bolts and remove the carrier from the hub;
By using a screwdriver through the wheel studs, rotate the disc until the hole in the disc is aligned with the adjuster;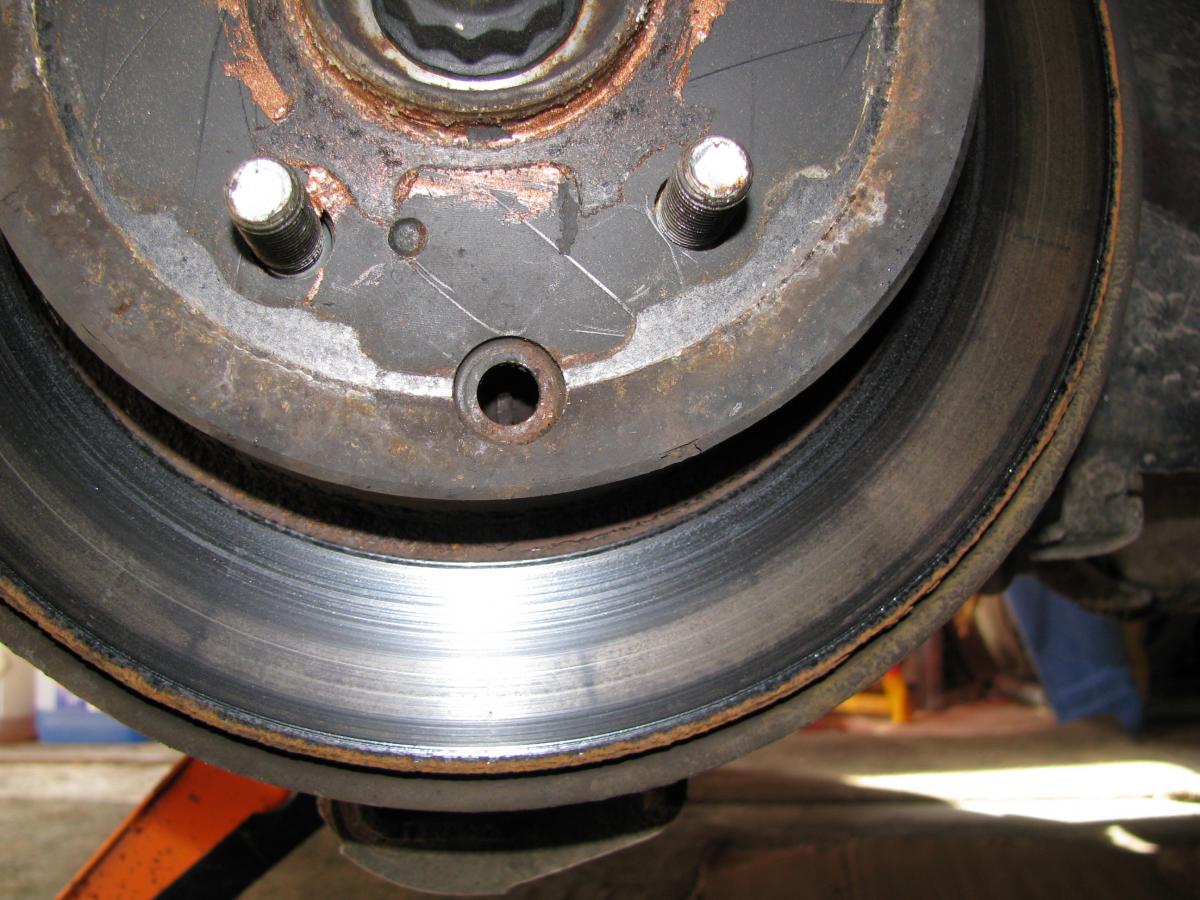
Then use a screwdriver to de-adjust the shoes inside. Look at the diagram for handbrake adjustment to see which way to turn. http://www.toyotaownersclub.com/forums/topic/77298-maintenanceimprovement-tips-43/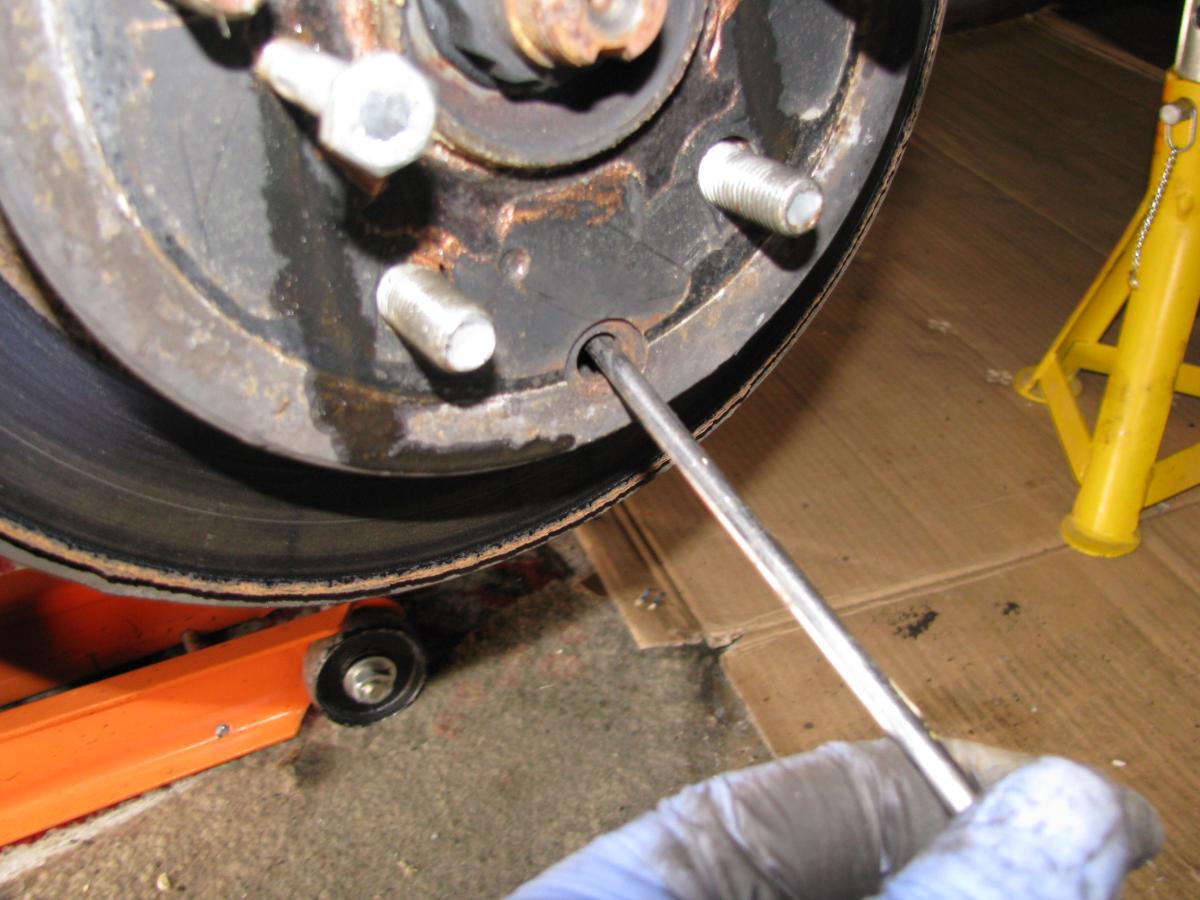
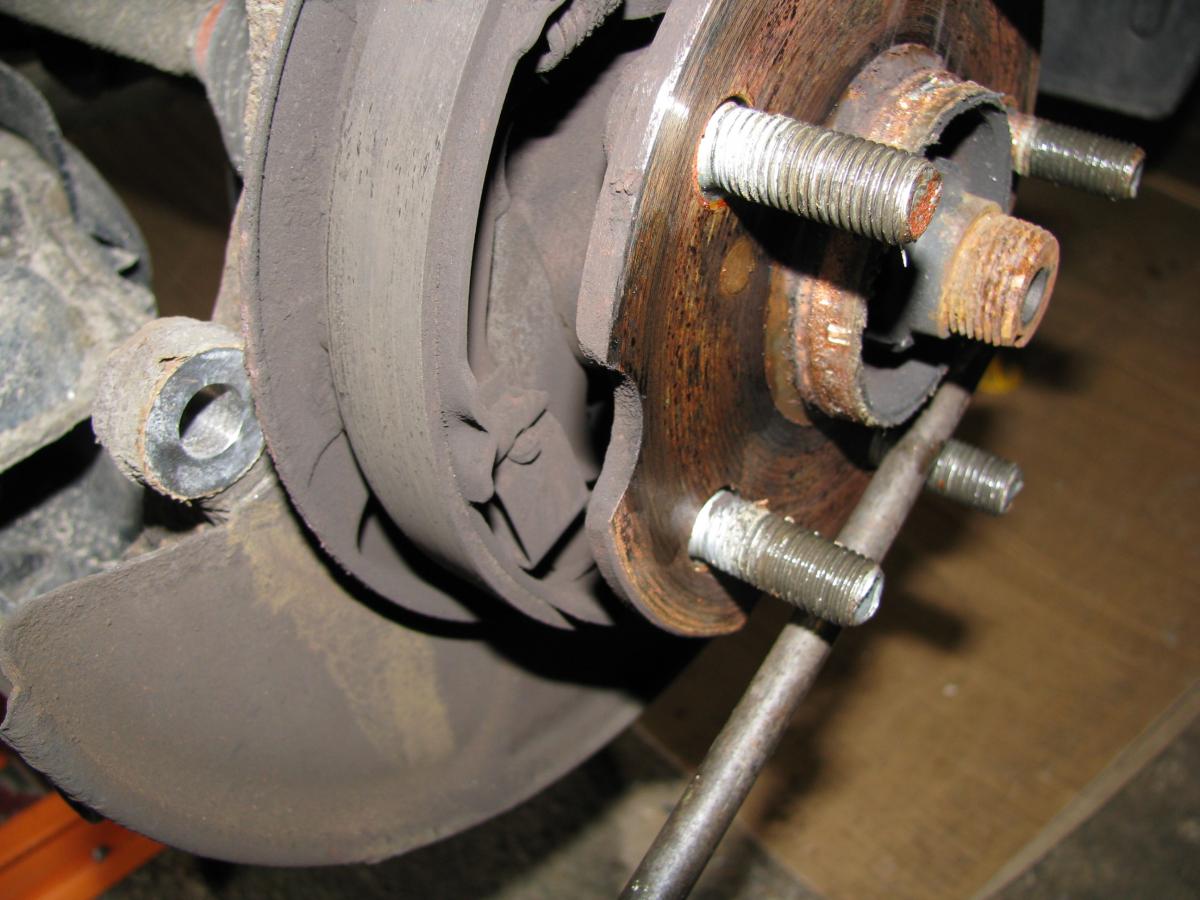
Now a drop of WD40 in the threaded holes and use a pair of 8mm bolts to draw the disc off;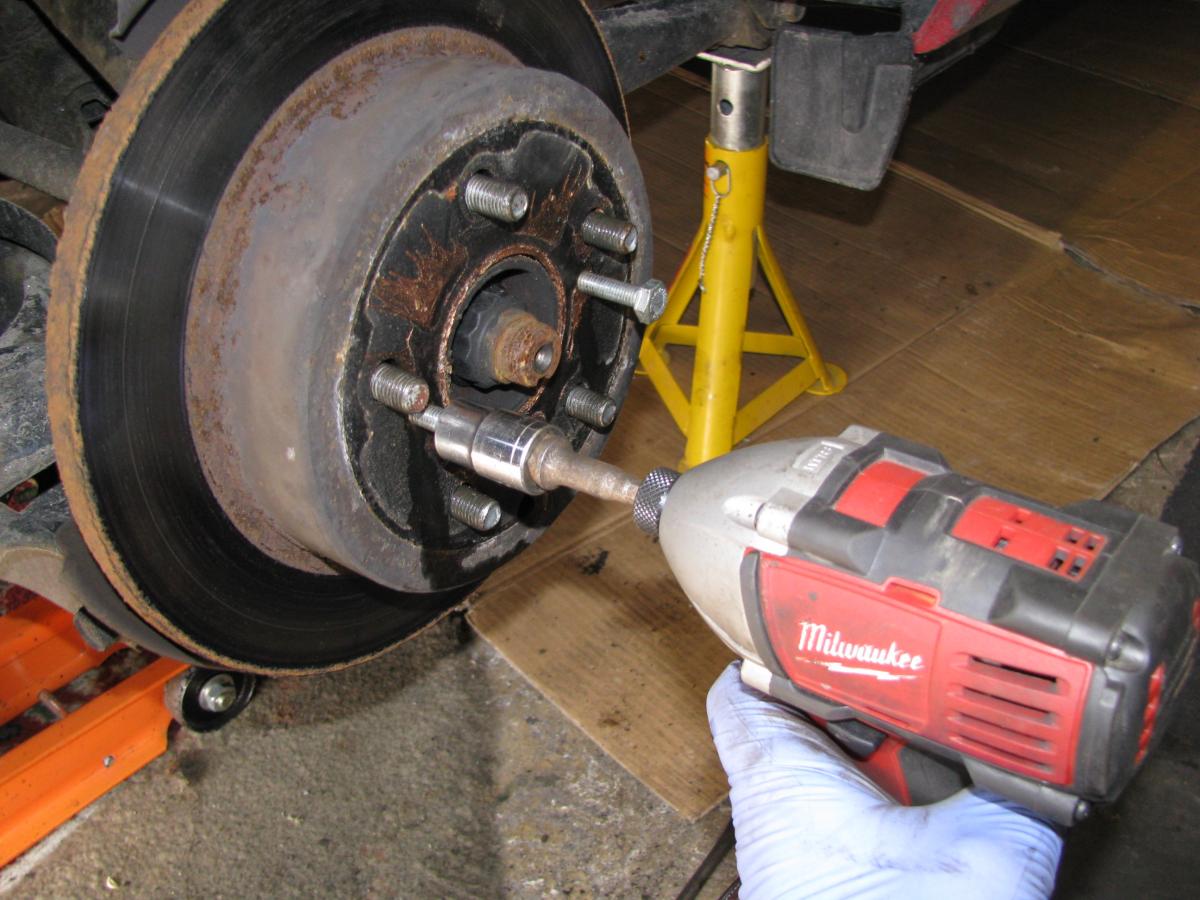
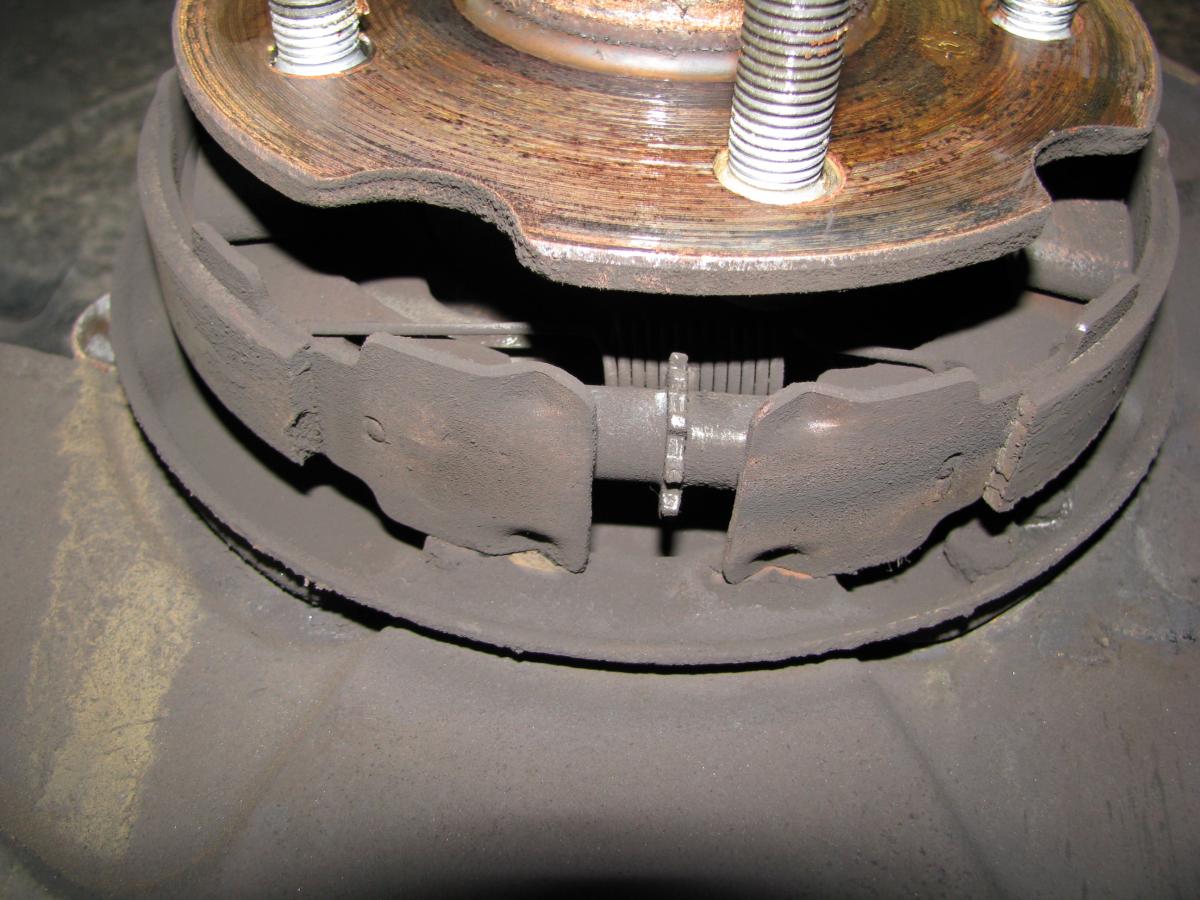
Now you can see inside OK and it will be grubby to say the least. I will show you how the springs go after so don't worry about them just now. The hub has a number of cut outs which are your best friend. Rotate the hub to give more access to the brake parts. They don't look much but trust me they really make it easier. You can use a pair of pliers to remove the front spring;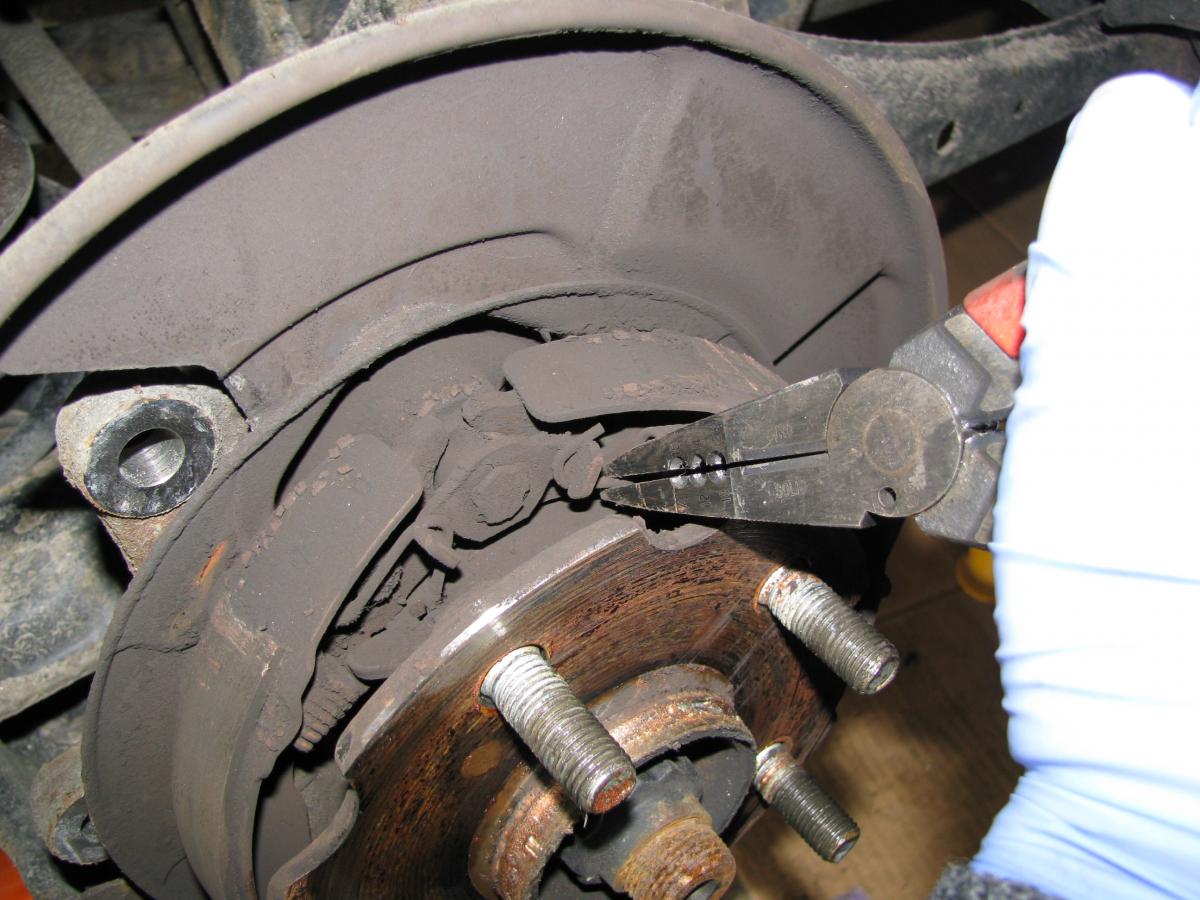
........and I just popped the rear spring off with a screwdriver.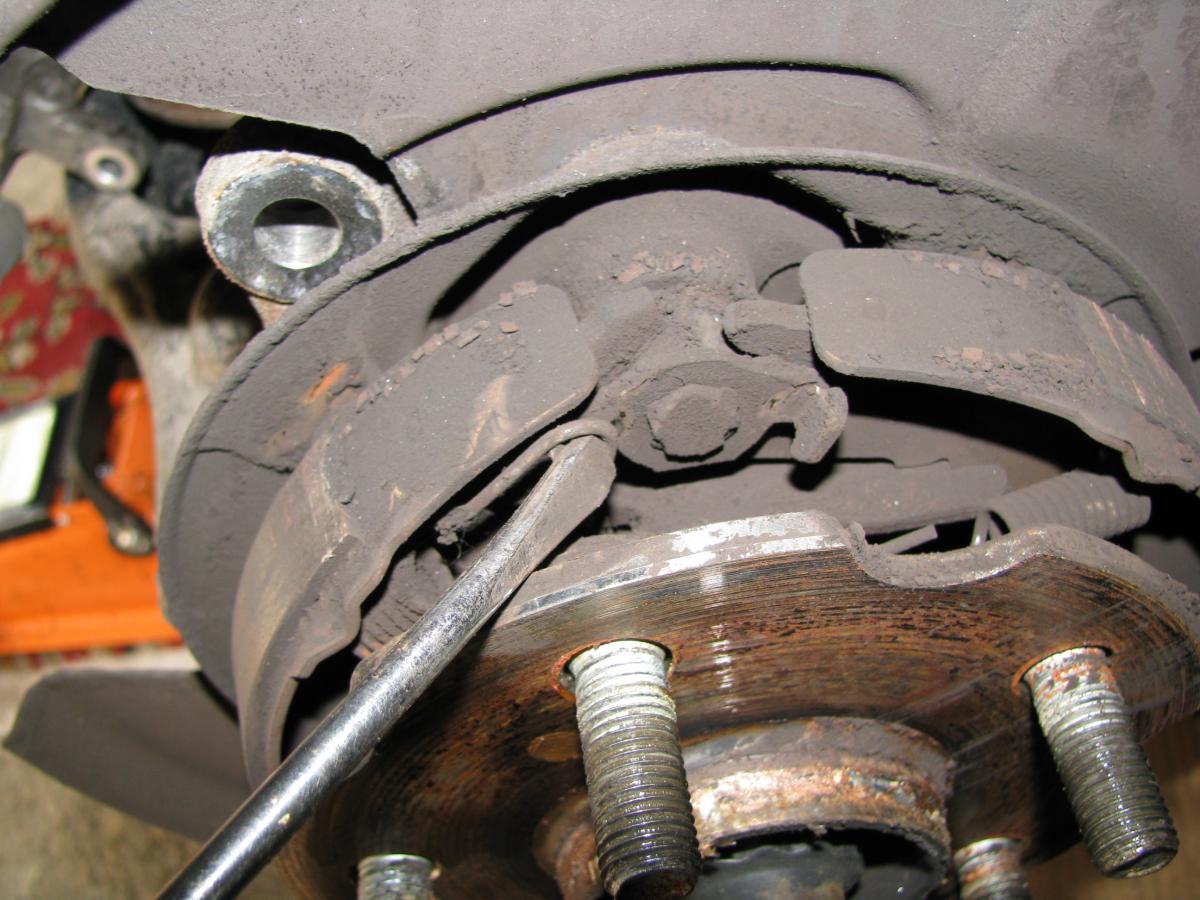
Each shoe has a hold down clip. I put my finger on the back of the pin and then with a pair of pliers, push the clip in and grip the head. Turn it 90 degrees and it will pop off. Now from under the brake, unhook the lower spring and pull the shoes off. There is a metal link which acts a compensating arm at the top. When this drops off, the handbrake lever will pop right off. Leave it attached to the handbrake cable. This will all make sense when you see it. Ok, now time to have a clean up. I washed it all down with soluble degreaser and wiped clean with a rag.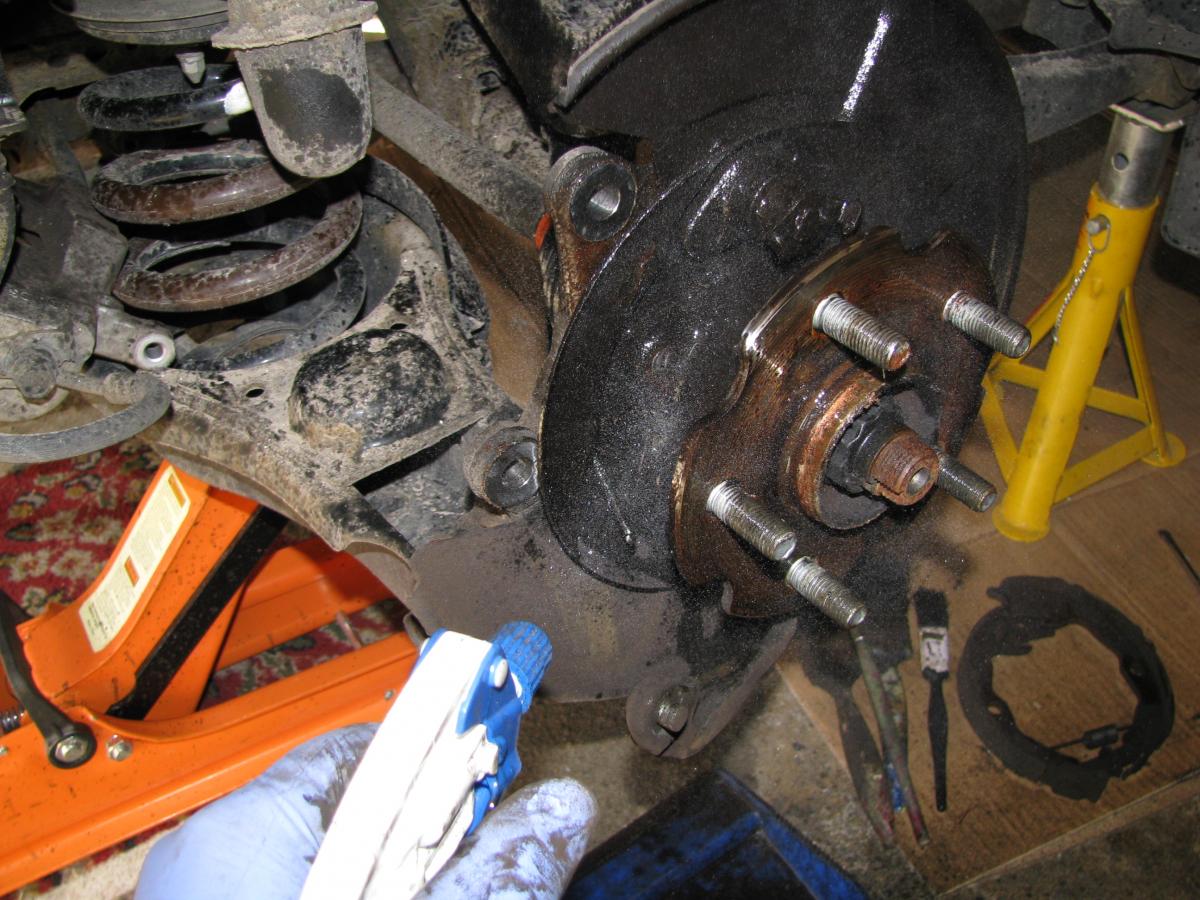
Now wash the brake parts off. I have assembled them here so you can see how the springs go. You can see the compensating plate at the top which as well as acting as a bell crank to apply the opposite shoe, holds the handbrake lever in position. The threaded part of the adjuster goes to the back and the two top springs hook onto the backplate when assembled. You can also see that I use special ceratec grease which is specially for brakes. You can use high melting point grease but use copper grease as a last resort as it congeals with age. The retaining clips face down as shown when fitted.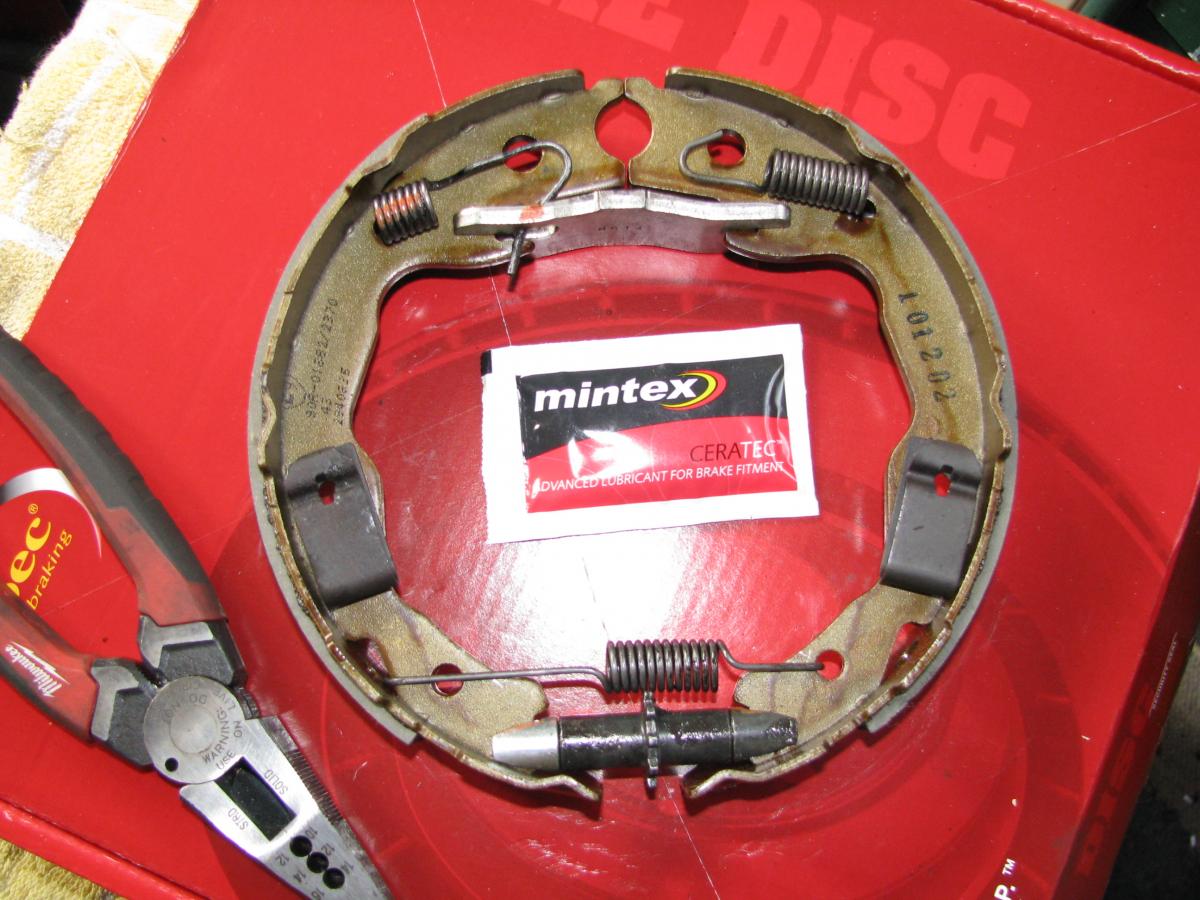
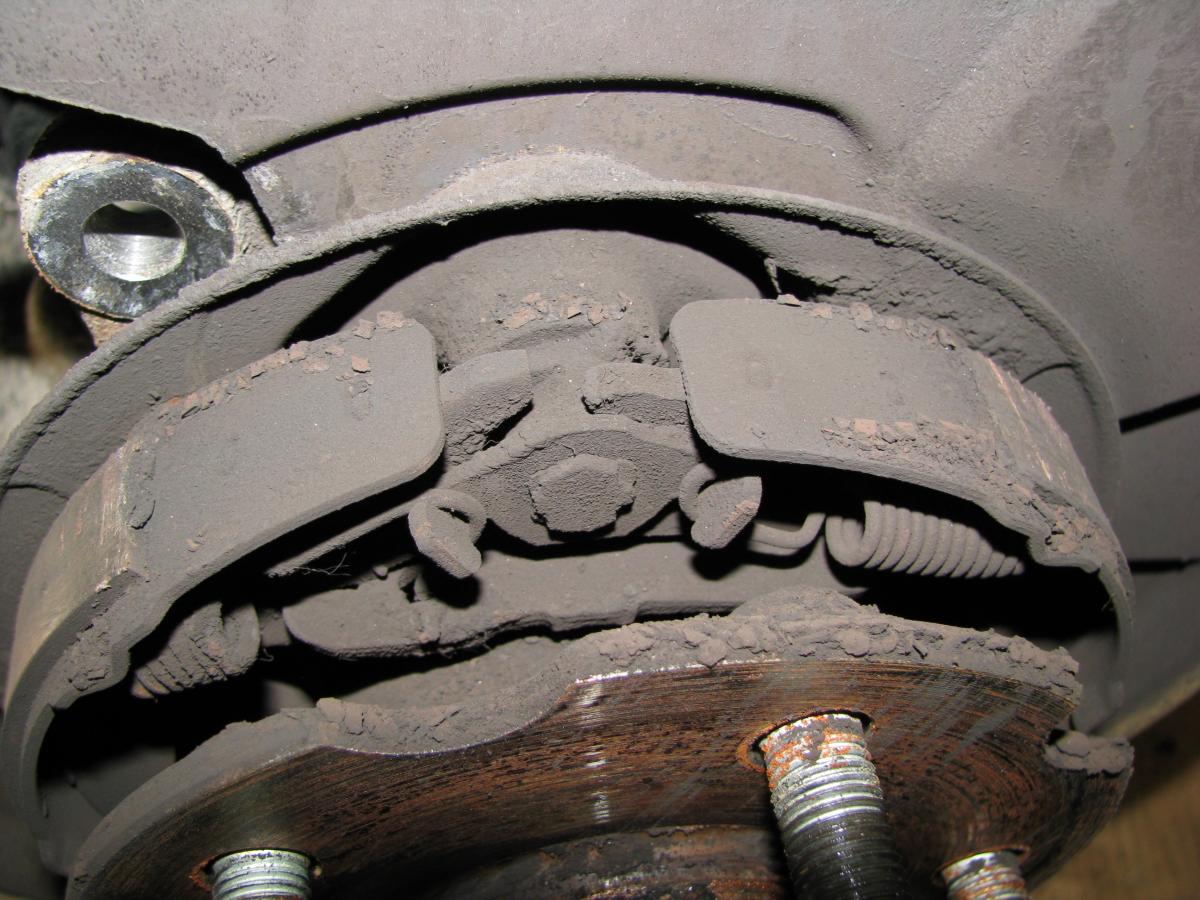
OK now back to the car. Wipe a smear of grease onto the contact points on the backplate - where the shoes rub. You also want some on the round abutments and each end of the adjuster - everywhere there is metal to metal contact. First hook the front shoe onto the brake. Put the retaining clip on. It's a fiddle but while holding the head of the pin, align the cut out and push the clip on and then turn the head 90 degrees. Now put the compensating plate in the top and hook the front shoe spring to the anchor on the back plate. Now after greasing the hand brake lever pin, insert it into the shoe and locate it into the compensating plate. Hook the spring into the plate and then anchor it onto the backplate. Now attach the retaining clip into the rear shoe and that will stop the hand brake lever from keep trying to pop off. Now fit the adjuster underneath. Hook the long side of the spring into the rear shoe first and then hook it into the front shoe so it is all assembled as the picture above. When done correctly it will look like this from above;
........and this from underneath;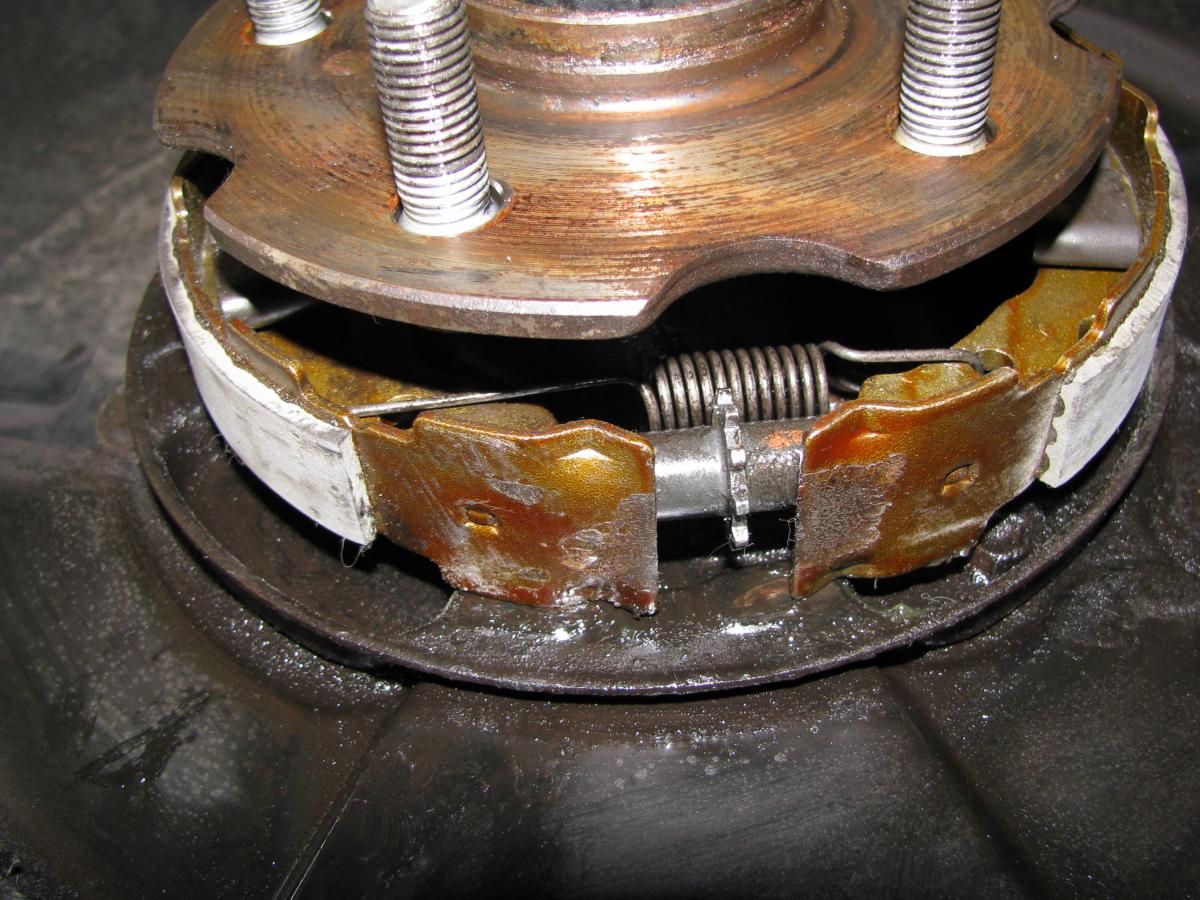
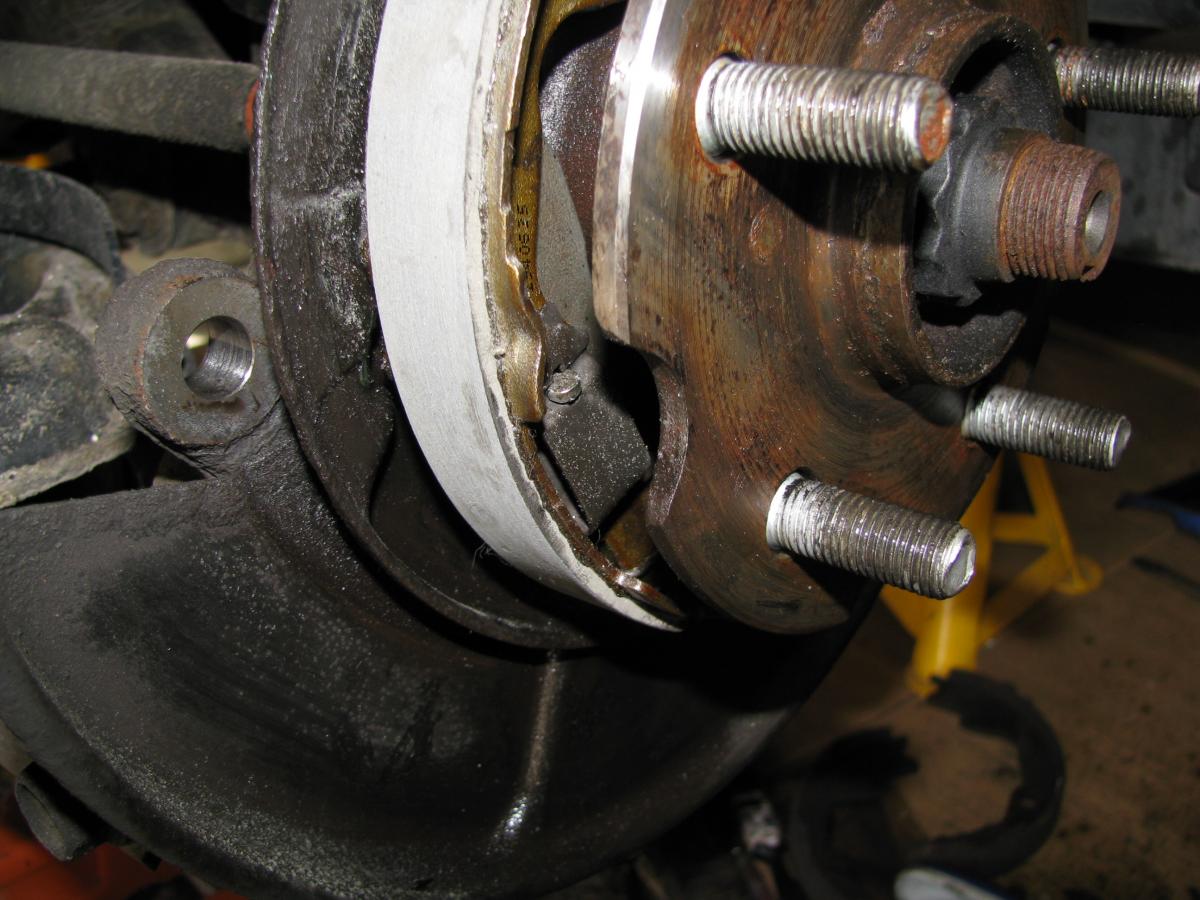
After washing the protective compound off the disc, fit it with two wheel nuts. Now working inside the car, completely de-adjust the handbrake cable. Now adjust the parking brake shoes following the link to the tutorial above. OK, now fit the caliper carrier (pop out the slide pins and clean and grease them). Lie the old pads against the new ones and transfer the wear indicators and the shims onto the new ones. Apply a smear of grease onto the contact points and fit the pads to the carrier. Now use a clamp to push the piston back in;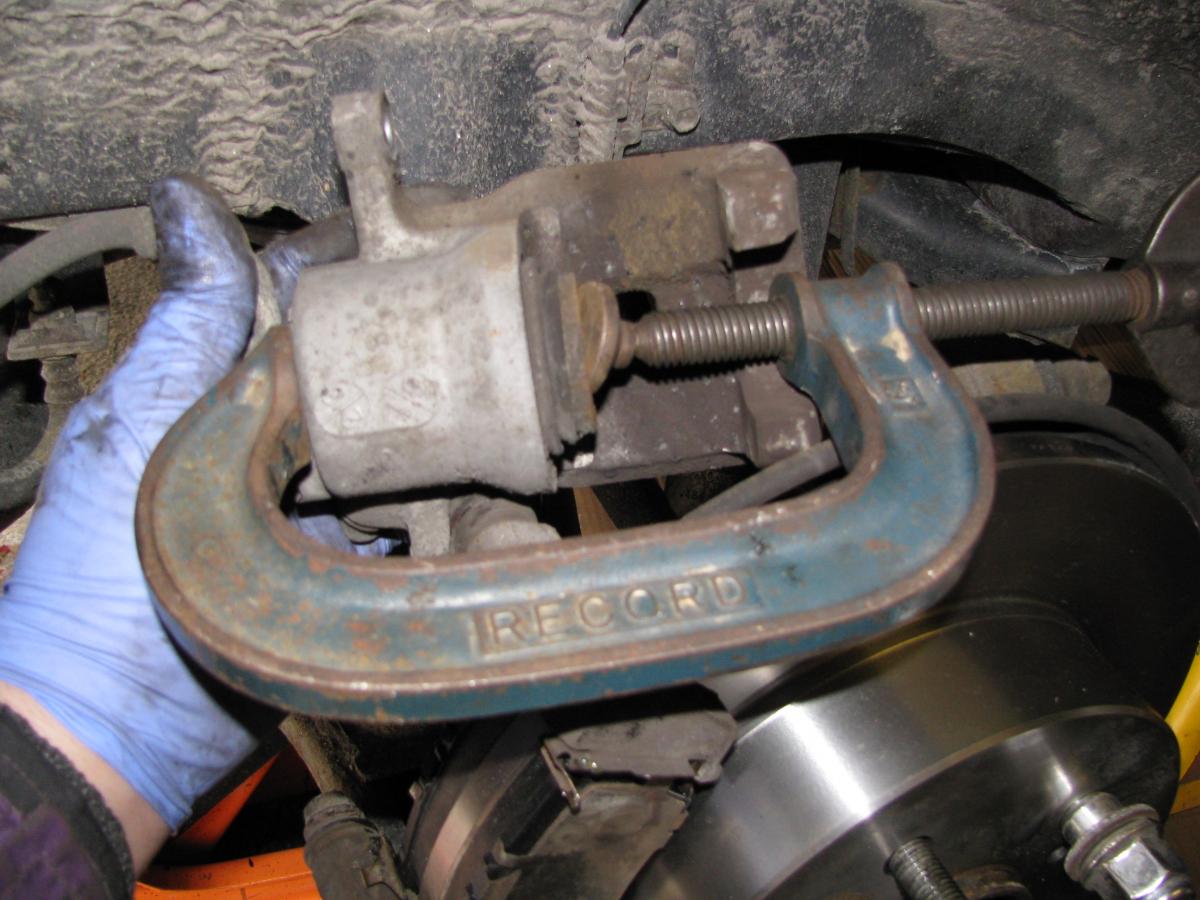
and then fit the caliper. Do both sides then adjust the cable inside the car. Press the brake pedal a couple of times and expect it to go to the floor until the pads contact the disc. Follow the pinned instructions for settling the shoes and do not over adjust the handbrake.
Torque settings;
Caliper carrier - 88Nm (65 ft/lbs)
Caliper retaining bolts - 26.5 Nm (20 ft/lbs)
Wheel nuts - 103 Nm (76 ft/lbs)

Recommended Comments
There are no comments to display.
Join the conversation
You can post now and register later. If you have an account, sign in now to post with your account.