
Difficulty - Easy
Time - About 30 minutes
Tools - Trim removal tool (example here) http://www.diytools.co.uk/diy/Main/Product...ProductID=26229
or flat blade screwdrivers, 10mm socket and spanner
Introduction
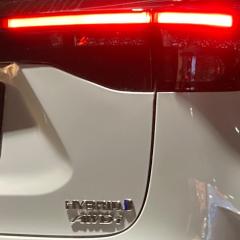
In order to prevent the rear lights from being obscured by the spare wheel, RAVs are fitted with a check strap that limits the door opening to about 60 degrees. However a replacement that opens to a full 90 degrees can be fitted at the risk of the owner. This makes the load space far more practical.
Part No 68650-42070
Price £60 inc delivery and VAT from Lindop Bros Toyota
Procedure
To acces the check strap it is necessary to remove all of the plastic trim from the rear door. If you have never done this you will think you are going to break it but don't worry it is designed to come off!
Open the rear door and start with the trim above the rear window. Carefully push the trim tool or similar lever between the right hand side of the trim and the door. If necessary lever off a piece of card to avoid damaging the paint. Prize down towards the floor;

As soon as you have enough room work across to the left side by putting your fingers between and easing the trim downward. There are 4 studs to pop off spaced roughly at quarters along the trim.
Next move to the side trims by levering from inside the exposed opening at the top;

Now the big panel at the bottom comes off. It is held on only by pop studs so again put the lever between and ease the panel out away from the door;

As soon as you can get your fingers behind, start to work your way around the panel progressively popping the panel off. When it comes away, squeeze the catch on the wiring connector and pull the wires off the light;

This picture shows all of the trim off so you can see the location of the pop studs;

Inevitably some studs will stay in the door
In this case ease them out with the trim tool or 2 screwdrivers and slide them back into the relevant location;

Now carefully separate the polythene liner from the door. Try not to damage it as this stops condensation from forming on the inside of the panel in cold weather;

Now undo the 2 10mm nuts;

and the 10mm bolt that hold the check strap on;

Do not let the door swing about or it could be damaged. Manoeuvre the check strap out from inside the door;

Put the new strap in and refit the fixing nuts and bolt. Replace the polythene liner (avoid getting that black adhesive on your hands!) and pop the lower panel back on not forgetting to first plug in the light.
Re-fit the side and top trim by poping them on.
Finally apply a drop of oil to the pivot point but not to the strap itself as it is self lubricating.

Recommended Comments
There are no comments to display.
Join the conversation
You can post now and register later. If you have an account, sign in now to post with your account.