
Difficulty - Medium
Time - Allow 60 minutes per side.
Tools required - A pair of 8mm bolts, screwdriver, spring release tool (can be manufactured), some coppergrease or HM grease and a selection of usual mechanics tools.
Introduction
Most 4.2 and 4.3 RAVs employ a rear disc brake and combine a drum parking brake into the design. The rear disc brake (foot brake) is a simple single piston design with a reacting bridge to the outer pad. In this design, when the inner pad touches the disc and cannot move any further, the outer pad is applied when the bridge is slid along guide pins with an equal and opposite force.
Changing the rear discs and changing the handbrake shoes goes hand in hand. Only when the shoes are in near perfect condition does it make sense not to change them. The handbrake is a "static brake", in other words it should only ever be operated when the vehicle is at a stand. For this reason, in theory it should never wear out. However, if new shoes are fitted with an old disc or vice versa, it follows that no "bedding" can take place and this is the reason that you should normally fit new with new. Having said that, there is a procedure for bedding a combination of old and new but this must be done with great care and is shown in a later pdf.
Procedure
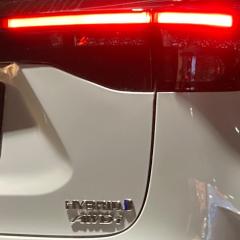
You can see above how to remove the pads and caliper.
Have a look at the handbrake instructions here to see how to de-adjust the brake.
http://toyotaownersclub.com/forums/index.php?showtopic=77297
Then follow these instructions;
Pay attention to the order of the shims and pins. You did absolutely right buying these off Kingo - they are often overlooked.
With the handbrake off and the brake de-adjusted, try tapping the disc and it may come off. If you intend re-using the disc, hold a piece of timber against it and tap it with a heavy hammer or lump hammer. If it doesn't come loose, screw two 8mm bolts into the extraction holes and wind them in progressively by equal amounts;

With the disc removed, you can see the shoes. Follow these instructions to remove the shoes but I will add a few photos for clarity.
NOTE - the pdf shows the LH brake and my photos show the RH brake so keep that in mind!
Trust me, the pdf makes it sound easier than it is. This is a fiddly little job and you have to work behind the hub. My advice is that you use a screwdriver to turn the hub (gearbox in neutral);

.........to line up the cut outs with those steady pins. I have the proper tool as you can see here;

The idea is to press the cap in and twist it quarter turn to align the slotted hole at which time it will spring off. You can do it with pliers as shown here;

Put your finger around the back of the brake and stop the pin from pushing through and then push and turn. You will drop the pliers many times and you will get a large collection of blood blisters but once you get the knack they will pop off. If you really struggle, ask an assistant to stop the pin pushing through while you use both hands on the pliers. When the steady posts have been removed you can see about unhooking the shoes. It is sometimes useful to take a few digital photos so you can see how they go back. Here you can see I have the proper tool but you can make one by bending an old coat hanger into a large hook and making a tiny hook on the end;

When the return springs are off you can remove the front shoe but the rear shoe has the handbrake lever attached. To unhook it, pull it down past the hub...............

......and let go. Now use both hands to push the spring back up the cable and grip the cable with a pair of long nose pliers then slid the cable off the lever;

Now you can clean everything up and remember, if you have any doubt about those shoes replace them. Here you can see I've cleaned the backplate and greased up all the contact points;

Refitting is described in this pdf;
It is basically the reversal of removal but take your time and don't forget a second pair of hands might make things easier if you can find a willing assistant. You need the handbrake cable hooked on and then fit that rear shoe. You then need the other shoe and the shoe strut with all the little springs. Use these pdf's and you photos to check all is OK. If you didn't get blood blisters taking the steady posts off, don't worry you will get plenty putting them back :censor: Don't forget there is a cut out in the hub that will afford some more access but it isn't exactly spacious so if you get upset, have a brew and leave it a while. When it is back in one piece it should look like this;

Now clean the linings with abrasive paper (avoid the dust) and eyeball the shoes to make sure they are concentric with the hub. Now would be a good time to apologise to your assistant for all the insults you made while fitting those steady posts - don't forget there is the other side to do. Pop the disc on and run a couple of wheel nuts up just while you adjust the shoes as shown in the handbrake instructions;

Now build up the rest of the brake (caliper and pads).
OK now if you mixed old and new you will have poor contact between the shoes and pads and as this is a static brake you will never get them to bed in. For this reason it is necessary to force bed them and think on you are working tiny brakes against a gigantic vehicle and you can soon do some damage so if in doubt to it little and often and only enough that the handbrake holds. It is acceptable to rub the handbrake with slight pressure for a few seconds from 30mph once every 6 months just to keep the linings clean.
Extra Fields
General
-
Time Taken?
60 Mins
-
Difficulty Level? 1-5
3

Recommended Comments
There are no comments to display.
Join the conversation
You can post now and register later. If you have an account, sign in now to post with your account.