

How to install an aftermarket radio/cd/mp3 player in your T25 Avensis - I joined up here and found there wasn't a guide, so I had a go and took some pictures and tried to write one. Hope it's of use!
Right. First of all you need a 10m socket, with a long handle so you can unscrew the bolts that hold the radio and air-con unit (which are also stuck together - more on that later). You also need an ISO adapter to suit the Toyota radio plugs (such as: this) and a bit of plastic to fill the gap left around the radio (such as: this) or you can buy them both together. But yeah, basically go on ebay and get an ISO harness adapter and a fascia adapter!
FIRST, REMOVE ANY CD YOU HAVE IN THE MACHINE! REMEMBERING THIS ONCE THE RADIO IS ON YOUR KITCHEN TABLE CAUSES CONFUSION AND DELAY.
Once you have all the things, first take off the gearknob and surround. The knob unscrews (eventually) and once that's off, I find if you hold the surround by poking your fingers down where the gaiter is and pulling the whole surround upwards using the gaiter as protection it avoids trying to pry it up around the edges. Once you've eased it away, you need to unplug the electrical connector for the cig lighter, which has a little clip, so don't just yank it.
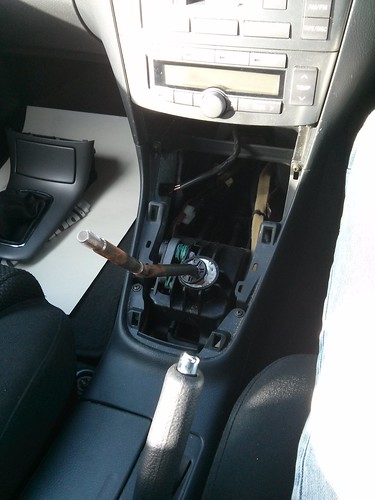
Untitled by Tony Lloyd, on Flickr
Once that's done, stick the gearknob back on, just so you don't accidentally duff the radio/aircon unit up on the big pointy metal stick should you drop it or something.
Next, you want to remove the top trim where the cup holder is. Easiest to open the glovebox, and just pry it away with your fingers. i found it came away pretty easily, but you need to unplug the electrical connector for the heated window, etc. As with the cig lighter there's a clip on the bottom of the plug.
Untitled by Tony Lloyd, on Flickr
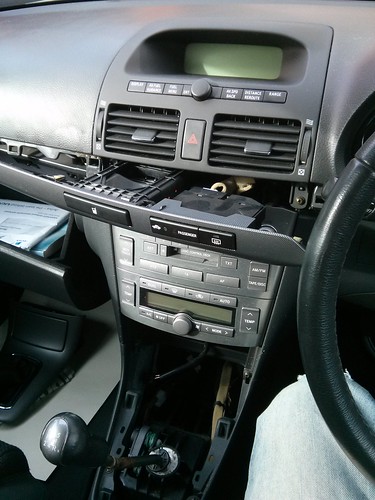
The Radio and Aircon are clipped together as one unit with a big metal frame. the frame is bolted tot he dashboard by 4 brass (or brass coloured) bolts. Two at the top, and two at the bottom. They should be fairly obvious. The top two are a bit tricky to get at, try not to let them fall down behind the dash when you take them out! (You can see the top left one here)
Untitled by Tony Lloyd, on Flickr
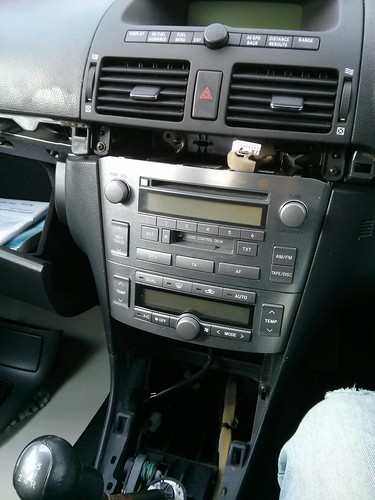
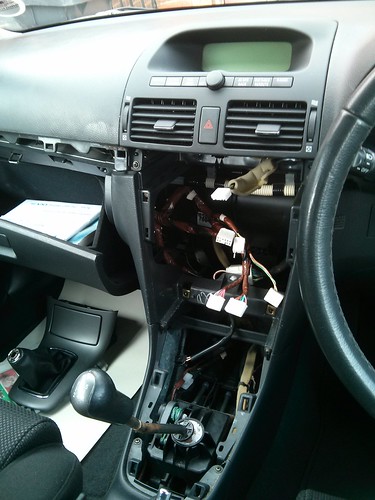
Once you've unscrewed those, ease the radio & aircon block out, and unclip the many electrical plugs from the back. There's 2 for the air-con (IIRC) and three for the CD player if you have stering controls. Obviously some specs will differ slightly, but broadly speaking, the plugs will only fit in the holes they're meant for, so it shoudln't be too bad mating them up again! Once they're all unplugged, your dashboard should looks something like:
Untitled by Tony Lloyd, on Flickr
And you should have something like this left over:
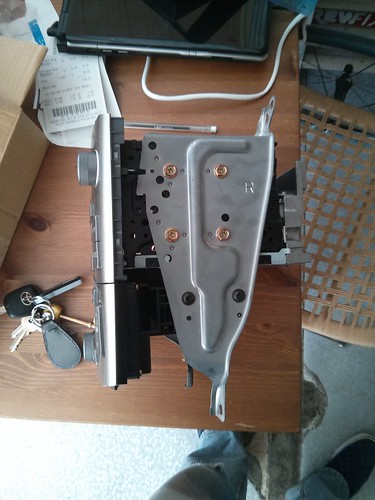
Untitled by Tony Lloyd, on Flickr
Unscrew all those bolts/screws on both sides. Once you have the metal side plates off, to separate the air con and stereo units, you slide them sideways from each other. I had to break one of the clips to work this out, but if you just slide the radio to the left (I think) as you look at them, they will slot apart like magic!
You can then attach the plastic fascia plate (this one) the same way. Modern radios usually have holes strategically placed in the side of the radio chassis to accept screws/bolts like the above. Mine did, although it didn't like the gold-coloured bolts which were holding the Toyota radio in, so I had to dig our some others. MAKE SURE WHATEVER SCREWS YOU USE AREN'T TOO LONG! (See your radio documentation to be sure, although it's usually embossed on the side or top of your radio saying "WOAH, ONLY 8MM SCREWS, YEAH?" or similar.)
Anyway, screw it all together like a meccano thing, with your radio hovering there in mid air (for now), then add the fascia surround, and you might end up with something like this:
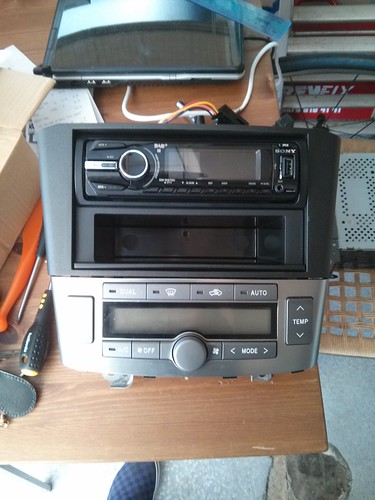
Untitled by Tony Lloyd, on Flickr
Now, the rest should be easy. Take care handling the unit, especially as the plastic fascia adapter is probably flimsy and brittle. Offer it up to where the old one was, and plug the connector adapter onto the toyota wires, then the back of your radio. Don't forget to re-connect the air con too. Then once it's located (you might have to ease the fascia bit into the gap as they're not typically made to the most exacting quality standards), then add the bolts. (It's worth checking everything works before you bolt it all up and put the gear surround and cupholder bits back!).
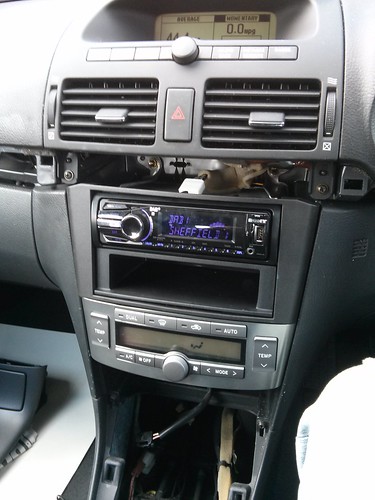
Untitled by Tony Lloyd, on Flickr
Basically from here, re-fitting is the reverse of removal! Just carefully ease the gear surround back on (you'll need the knob off again first, then on again after!) and re-fit the top trim (again, starting at the glove-box end) and reconnecting the plug for the heated rear window as you go.
Ta-da!
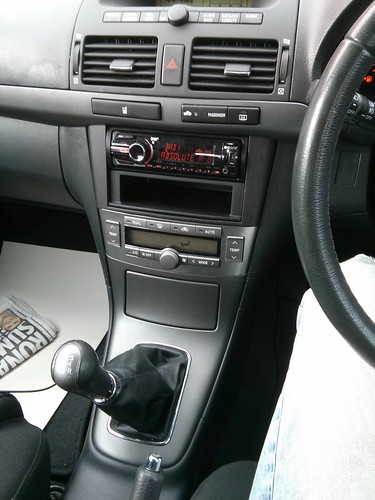
Untitled by Tony Lloyd, on Flickr
EDIT: I should have mentioned, your steering wheel controls won't work unless you buy an extra harness adapter, which I haven't done. They do seem to be readily available though, here's some.

